Tutorials and recommendations
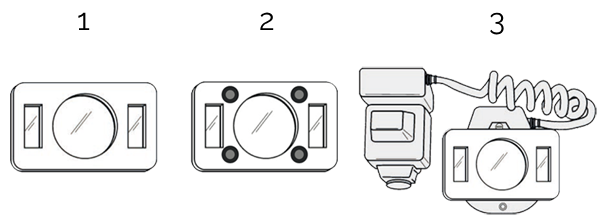
MOUNTING
- Place the magnets on the rear side of the filter.
- Fix the adhesive layers onto the magnets
- Attach the filter to the flash in a centered position
- Apply pressure on the magnets (to each one) to fix them on the flash
- You can start using your polarizing filter.
- If it’s necessary, you can remove the adhesive layer and fix de magnets with permanent glue.
WATCH THE VIDEO
CAMERA ADJUSTMENTS
RECOMMENDATION
- Shutter speed: automatic mode (A-AV), or manual mode (M: 1/125’’-1/200’’)
- Aperture: f16-22 (adjust it depending on light decreasing)
- WB: flash or custom mode
- Flash: Auto TTL or M (1/4 to 1/1)
If images appear darker tan desired:
- EV +/-: +1 o +2
- ISO: 200 to 400
MAINTENANCE
Don’t touch the filter with your fingers. Don’t press or hit it, because its sensibility.
You can use compressed air to clean it.
An alternative is a paint brush or a microfiber cloth. As a last option, you can use a cotton swab moisten with cleaner liquid.
ACCESSORIES
To achieve an optimal polarization, we recommend to use Columbia or translucent cheek retractors.